


This post has been in my drafts for a while. I wanted to share it as it seemed to be a theme I unknowingly explored. And here I thought I was bad at sticking to one subject or concept….
Enjoi.

This post has been in my drafts for a while. I wanted to share it as it seemed to be a theme I unknowingly explored. And here I thought I was bad at sticking to one subject or concept….
Enjoi.

This summer I made the decision to partake in a movement coined “Legendeering” (legendeer.org)
n. legnd-ēr′ĭng
1. The process of informing creative outcomes through direct personal experience.
2. The designing of direct personal experience in the generation of creative content used to inform personal voice and stylistic outcomes.
I choose to partake because I found myself in a spot where I was unsure of how I wanted to develop my work. I have spent many years in school developing technique and learning new content but I was left in a spot unsure of how or what concepts to develop. I didn’t expect to leave this workshop with a full blown direction, but ideas and a recollection of the subjects that interest me. I want to bring myself back to the reason I set out to be a creator in the first place.
I opted to partake in the second half of the workshop, Week 2. The weekend’s lectures took place at VCU’s Rice Center. This is where Sterling Hundley, Matt Wallin, Chris Visions, Eric Pfieffer and TyRuben Ellingson all took time to speak about not just the process of working on a piece, but how their work changed with time. Their work grew as life progressed. No matter the duration of each artists carrier, It was apparent that life was a part of the process and growth of the work. So whatever comes will be developed with time. (Later we also heard from Robert Meganck and Lori Panico )

Week 2’s Camping Trip in images.
It was truly enriching getting back to nature. I don’t know that I necessarily want to directly use my experiences from this trip in any story I might develop, but it gave me time to think about the education I have built over the last 8 years and how I might want that to play into personal work. The biggest part now is planning what I want, developing a strategy and getting rid of any obstacles. I feel as though the beginning part of my life, part of which is planned for you, was very instinctual and I understood what I wanted. Now, with limitless possibilities and more control over what to create, a path or destination is unclear. Now I need to creating an intention and stop letting my self be so distracted. Now that I am home working and with friends & family, distraction is what I have found to be the biggest obstacle.
For me I think this experience was also good because it brought me back to a place where I feel most creative, Richmond, Virginia. And while I like being home (Good Ole’ Harford Co. MD) and I don’t feel that I need to move, the RVA creative environment is something to be noted. The people are all searching, creating, embracing and there is a forever sharing of ideas. I enjoyed meeting a new community of artists in a seemingly similar “life place” but different ideas of what they want. From this trip I learned I don’t know what I want and that is okay. I will just focus on what I like doing. Making and sharing things.
Some of the people I met:
http://instagram.com/cadmiumcoffee
http://instagram.com/lenaszymaniec
http://instagram.com/chikinfat
http://instagram.com/tlehinvictus
http://instagram.com/legendeer
If you also took part in legendeering in some way (whether online or in person) feel free to leave comments & experiences below!
You would think I would have had enough of school by now. But I couldn’t resist. I want to learn more about light so I am taking a Studio Lighting Photography class. I think this will be very helpful for my 3D and illustration adventures. And admittedly, I should learn to better use my camera.
Today I want to share the beginning shots. Here are some initial photos after the first class!
Meet our model Alex:


We only used one light and sometimes the reflector. Other than that… not much editing. Okay fine, I might have adjusted the curve a tad in Photoshop, but I know you are not judging ;).
Thanks Alex, you are a great model!
For information aesthetics we are coding our own program which reads a dataset and displays it to the user. I chose to collect taxonomy information from the Integrated Taxonomic Information System. The dataset I collected consists of a list of names starting with the Kingdom ‘Animalia’ down to all Genuses ( I was having trouble downloading a list which included all species, probably because it would be huge). To give more context to the dataset I manually input the levels of ‘Life’ and ‘Domain’. Then I parsed the data ( which was .csv) into strings representing the paths which looked like:
‘Life>Eukaryota>Animalia>Chordata>Aves>Strigiformes>Oscines>Podargidae>Batrachostominae’
Which represents the taxonomic levels:
‘Life>Domain>Kingdom>Phylum>Class>Infraclass>Order>SubOrder>Genus’
The path is then interpreted and presented to the user as circles which can be moved on the screen. Right now, the placement of circles has no correlation to relationship. Just the idea that larger circles represent more abstract groups of organisms (‘Life’ followed by ‘Domain’) while smaller circles represent more defined groups ( ‘Genus’ ). When the user hovers over a circle the lowest level name of that path is displayed, while the entire path is displayed at the top of the screen.

The program you see above only runs a sample of my dataset, as the entire taxonomic list is ridiculously extensive.
…I decided to continue with this project. I think its great I was able to parse the data, but this isn’t really how I want to display it. I want some sort of relationship between each node and the path be evident. So my goals for the final project are to:
If I have time left, I might try to implement a slider that allows the user to quickly go from displaying just the ‘Life’ node to all nodes… I just really like the idea of having a center node and then others radiating out from this node. I am not sure if I want connection lines. While I think they give better context, I enjoy the chaos within the organization. Because ultimately taxonomy is just a way for us to organize and comprehend the chaos.
So to get started I went through a tutorial by Jer Thorp on Spherical Coordinates:

This image links to screenshot of me playing the interactive

This image links to screenshot of me playing the interactive
I used spheres instead of ellipses ( as he does ). I like how the nodes move along spherical paths (oppose to moving linearly in x, y, z space) and I am hoping this tutorial will help me keep the nodes realative to each other , using undrawn spheres as boundaries.
If anyone has other suggestions for how to improve the first iterative, please share :D! By the end of the semester you should see some progress.
I took some time to practice modeling with Molecularmovies.org ‘s Mouse Embryo tutorial (http://molecularmovies.com/pages/bysoftware/ , it is the fourth tutorial under the ‘Maya’ section ).
This tutorial was very helpful, and gave me a better understanding of subsurface modeling. I would say the trickiest part was modeling the toes by extruding along a mirrored axis.

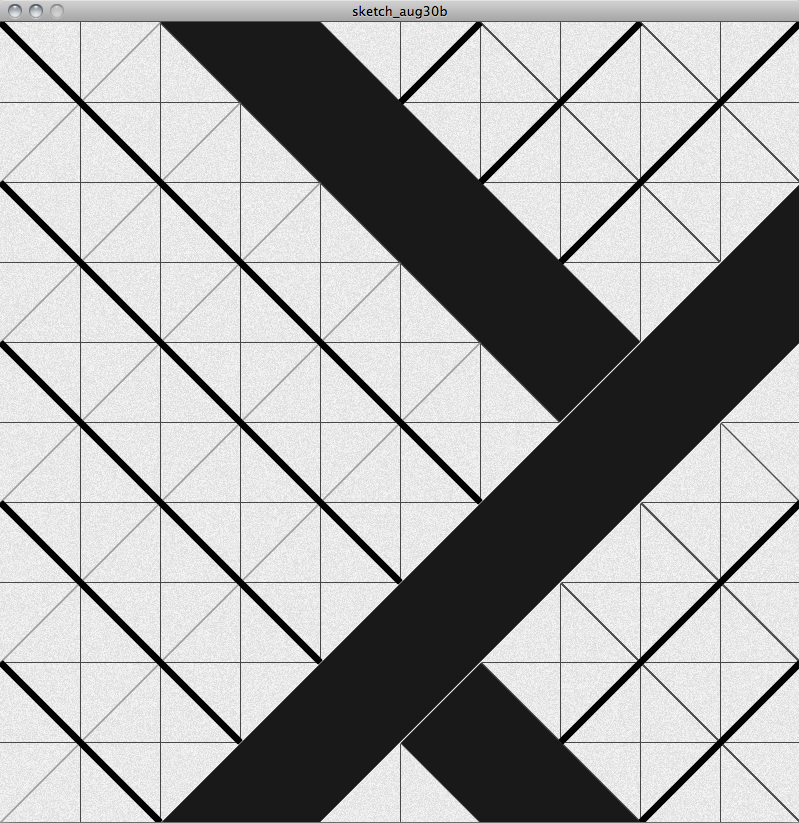
For exercise 1 I copied a Theo van Doesburg. At first it looked boring, but then I realized… how it is not. I think what makes his piece is how the moderately bold lines fight with your eyes to move off the page in 2 directions (left or right) from three different spots.
The original piece:

My representation:
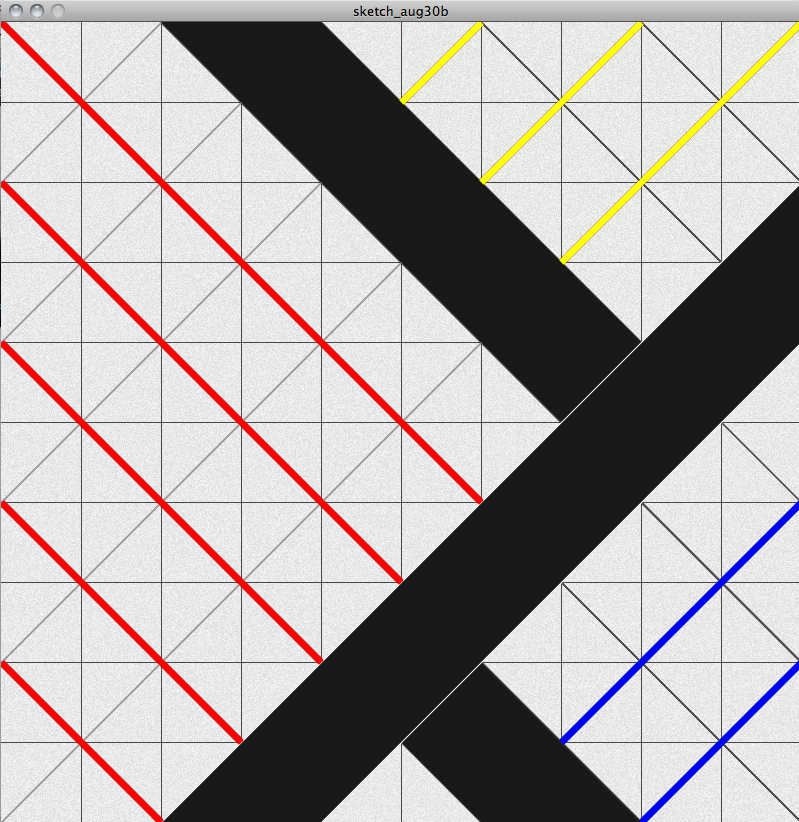
And since we are probably supposed to figure out how to put some color in our sketches…
on mouseClick:
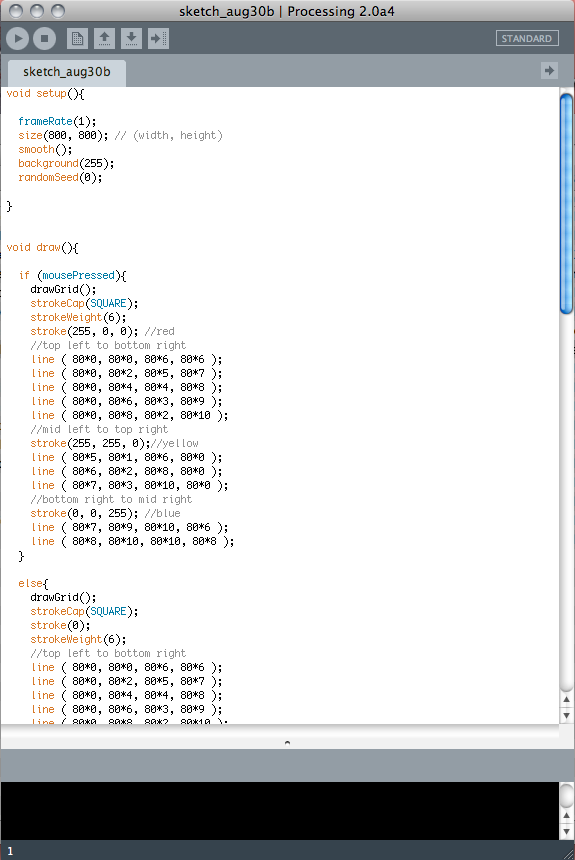
and a screen shot of some of that fancy coding stuff we get to learn:
My latest composition was generated using photoshop and zbrush. The image depicts the inside of the stomach, and highlights peptic ulcers. I chose to create magazine cover art for the NDDIC.

While the learning curve is steeper than 3ds Max or Mudbox was, I was definitely able to get an over view of the potential it has. The materials are initially difficult to control. By this I mean if you want to add different textures over the model you paint them on, but I did not always see a result. Also, I was not extremely thrilled with the lighting arrangements. I enjoyed playing around with the layer passes. In retrospect I would have liked to create a more dramatic piece, but I got the knowledge I needed out of the assignment.

Today was a treat. We were given the opportunity to understand the suturing and stapling processes in surgery by practicing on foam organs.


Polycystic Kidney Disease is an inherited disease. Most of the time this disease is an autosomal dominant genetic trait. This results in the disease affecting at least 1 out of 1,000 Americans, sometimes even more , given that not everyone shows symptoms. The size of the affected kidney is overwhelming. This disease must be terribly painful given amount of space it intrudes on within the person’s body.

Editorial for PKD – mock ad for the PKD foundation.
To start the construction of this model, we extracted a model from DICOM data provided by the instructor. The model was exported from Mimix as an STL, improted into 3DS Max, then exported as an FBX so it could be imported into Mudbox. Once in Mudbox, I created then molded a sphere to flow with the over all shape of the kidney. A displacement map created from the high-poly kidney model and then applied to the re-shaped Mudbox sphere. This is the same process I used to create a model of my face.
Like I mentioned previously, Mudbox is AMAZING! The ease of sculpting, painting and creating detail on the model is extremely intuitive.

Screenshot of Kidney from Mudbox
The over all look and feel of the kidney changed throughout the process of building the model. Going from Mudbox to Max to Photoshop can really take a toll on the final product. You just have to stay calm, pay attention and keep modifying settings to get what you want. When I was in Mudbox I spent a lot of time painting different layers, adjusting the hue and saturation of the layers, and sometimes even the opacity. Then when you save out each file type ( the 3d geometry and the texture files) they are not always applied as you want them to be in 3Ds Max. And what I mean by that is, you have to do a lot of adjusting, the process is not as manual as you might hope. I found it easier to save the kidney from Mudbox using “Save scene to 3DS”. Then I saved each of my paint layers from Mudbox using “Save channel as Photoshop document”. This can be done by right clicking on one of the paint layers ( you can’t right click over “Diffuse” you have to right click over one of the layers… but don’t worry it exports the entire channel ; ) ). In 3Ds max I changed the Bitmaps to link to the .psd documents. If you follow this process you have to open up the .psd in Photoshop, and turn off the red grid.
The hardest thing to get to show as I wanted was the bump layer. Turns out, you can apply it over “100”. I also had to jack up the reflection, glossiness and specular layer more than I anticipated. The grand lesson from any 3D project: no matter how quick you think you might get through to rendering, there are always more properties you can tweak. No wonder all the good projects have teams of masters working together creating this type of work.
The the final frustration -once you render out the overall image and the different channels- keeping the overall feel in Photoshop. The feel changed some after I added the specular channel and did a screen layer of the lighting channel. I started loosing the orange in some of the bubbles. However I was okay with how it changed because I am REALLY pleased with how I got some of the bubbles to show up. I really wanted the iridescence of the cysts to come through and I think I achieved that (especially with the large bottom right cyst above the PKD logo ).

An work in progress detail I tweeted while painting the polycystic kidney
To learn more visit PDK Fountation Website.
Last semester our class had there face scanned:

We took that scan and retopologized the mesh using 3DS max tools:

This time around we were able to explore Mudbox, and personally I find Mudbox Amazing!

Mudbox allows the user to create displacement maps. The process involved importing the 3D scan of our face, creating a basic bust mesh provided by Mudbox. I took the time to Push and pull the mesh as much as possible in order to line the low poly mesh up with the high poly mesh. After I was satisfied, I created a displacement map by referencing the high poly (scan) mesh. After that displacement map is created, I then applied it to the Mudbox default bust. This is a pretty simplified explanation, but if anyone is interested just leave some comments, maybe I can mock up a demo ;).
The most difficult anatomy to construct, for me, was the eyes and the ears. However I know I can get there. It just takes a lot of reworking, sculpting and pushing back and forth. One tip is to zoom back out often. It is really easy to get lost in the details, and then loose over all proportion.

The next step I want to explore is adding texture by painting in Mudbox. Then I want to export the scene to 3DS max to get some hair action going on!
What do you think, does it look like me?
