Leg·end·eer·ing

Events, Inspiration, Just Learning, Photography, Uncategorized

This summer I made the decision to partake in a movement coined “Legendeering” (legendeer.org)

n. legnd-ēr′ĭng

1. The process of informing creative outcomes through direct personal experience.

2. The designing of direct personal experience in the generation of creative content used to inform personal voice and stylistic outcomes.

I choose to partake because I found myself in a spot where I was unsure of how I wanted to develop my work. I have spent many years in school developing technique and learning new content but I was left in a spot unsure of how or what concepts to develop. I didn’t expect to leave this workshop with a full blown direction, but  ideas and a recollection of the subjects that interest me. I want to bring myself back to the reason I set out to be a creator in the first place.

I opted to partake in the second half of the workshop, Week 2. The weekend’s lectures took place at VCU’s Rice Center. This is where Sterling Hundley, Matt Wallin, Chris Visions, Eric Pfieffer and TyRuben Ellingson all took time to speak about not just the process of working on a piece, but how their work changed with time. Their work grew as life progressed. No matter the duration of each artists carrier, It was apparent that life was a part of the process and growth of the work. So whatever comes will be developed with time. (Later we also heard from Robert Meganck and Lori Panico )

The Abandoned House


Week 2’s Camping Trip in images.

It was truly enriching getting back to nature.  I don’t know that I necessarily want to directly use my experiences from this trip in any story I might develop, but it gave me time to think about the education I have built over the last 8 years and how I might want that to play into personal work. The biggest part now is planning what I want, developing a strategy and getting rid of any obstacles. I feel as though the beginning part of my life, part of which is planned for you, was very instinctual and I understood what I wanted. Now, with limitless possibilities and more control over what to create, a path or destination is unclear. Now I need to creating an intention and stop letting my self be so distracted. Now that I am home working and with friends & family, distraction is what I have found to be the biggest obstacle.

View this post on Instagram

Morrgreenpins.com

A post shared by A U T U M N 🥀 R O S E (@autumnrose_studio) on

View this post on Instagram

My microcosm #legendeer

A post shared by A U T U M N 🥀 R O S E (@autumnrose_studio) on

For me I think this experience was also good because it brought me back to a place where I feel most creative, Richmond, Virginia. And while I like being home (Good Ole’ Harford Co. MD) and I don’t feel that I need to move,  the RVA creative environment is something to be noted. The people are all searching, creating, embracing and there is a forever sharing of ideas. I enjoyed meeting a new community of artists in a seemingly similar “life place” but different ideas of what they want. From this trip I learned I don’t know what I want and that is okay. I will just focus on what I like doing. Making and sharing things.

Some of the people I met:

http://instagram.com/cadmiumcoffee

http://instagram.com/lenaszymaniec

http://instagram.com/chikinfat

http://instagram.com/zimmrt

http://instagram.com/tlehinvictus

http://instagram.com/legendeer

If you also took part in legendeering in some way (whether online or in person) feel free to leave comments & experiences below!

Anatomy & Illustration Gallery Exhibit

Uncategorized

image

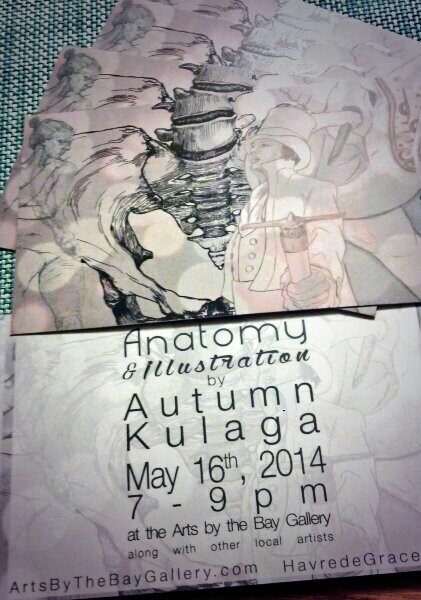
As some of you know I have joined the Arts by the Bay Gallery in Havre de Grace, Maryland. Havre de Grace is a beautiful little town by the water in the north east of Harford County. We are about 30 minutes north of Baltimore.

At our last meeting I was chosen as the featured artist for the May 16th Gallery Exhibition and I am super excited!

wpid-img_20140503_131554_957.jpg

Prosected Palm

wpid-img_20140406_150955_608.jpg

Water for Elephants

I decided to focus the show on my  anatomy and illustration. I wanted to see how the my work for medical illustration and other personal work fit together.  I tend to think that because I use such a diverse set of mediums and subject matters, that I am lacking a style. But as I put things next to each other a small “Je ne sais quoi” seems to appear.  Again, I am very excited to share all of my work with anyone who can make it to the gallery.

I think this comes at a good time. It allows me to see where this work has brought me. Going through the piles of art has given me an opportunity to think about what I was trying to do with each piece, and whether I was successful. It also gave me a chance to find “hidden jewels”. Pieces which I previously thought were crap, but now seem kind of neat. Maybe there is something in each work that I subconsciously put in them all. . .

gallery artwork framed


See the rest of the picks this Friday May 16th 7 – 9pm!  See the other art by the rest of the Arts By The Bay Community, amazing art and good company!

Arts By The Bay Upcoming Events

Anatomy on Society6

Anatomy, Traditional Work

Last year I joined Society6. This online art community has a nice collection of self-published work. This site provides work by a lot of different artists, all of which have added themselves to the community. It is amazing to see how creativity flows throughout our society.

Society6 provides a means for artists to share as well as sell their artwork as prints, phone cases or hoddies/tshirts. While the artist does not always making a lot per piece -depending on what profit they set for themselves with each print- they are able to help create awareness of what they do. And while some people are of the opinion sites like this “cheapen” the value of art, I think it is a great way for artists to build a community, share work, and fund their addictive art habits. It almost feels like going to the farmers market, and buying locally.

For this post I just wanted to share a collection of Anatomy Art I found while searching the site:

Gross Anatomy by Asleepstanding

The Eye by Broken Colors

True Anatomy by Ben Geiger

Anatomy 03 by Alvaro Tapia Hidalgo

Being Human 3 by Anapt

Boy Next Door – Silhouette and Anatomy Love Painting
by Joy Chokchai

Society6 has a lot of work to share, don’t be afraid to explore more!

From Sketch to 3D

3D, Just Learning, Molecular

Earlier in the semester I introduced my final project for Computer Visualization (Origination). I decided to create an environment to display the bacteria Giardia Intestinalis. This is a pretty intense little critter. I learned about this guy while taking Medical Microbiology at Towson University. It is amazing how many microscopic creatures surround us constantly!

After I came up with my idea, I needed to roughly figure out what I wanted my scene to look like. I created the following sketch as a general composition and color scheme. I didn’t want to make the sketch too detailed, as I was sure bits of the image would changed as I started modeling and texturing in 3DS max.

Once I had the sketch I proceeded to create the scene. One of the goals of this assignment was to demonstrate an understanding of render passes. Render passes, generated in a 3d modeling program when you render your scene, allow output of different channels. This allows for post-processing, or editing, in Photoshop. One of the benefits of this technique is ease of post render modifications (i.e. – its a big time saver). My gallery provides most of the passes I rendered out such as alpha, lighting, specular, ambient, diffuse and zdepth .

This slideshow requires JavaScript.

Then after hours of modeling, texturing, lighting, rendering AND Photoshop editing I was able to create this master piece:

As a tip to compositing newbies, don’t hesitate to generate a channel using matte. I didn’t do this when I rendered my ‘main Giardia’ render pass, so the environment in this render pass had all parts rendered, including parts unseen in the beauty pass. I was able to paint this out in the alpha channels, but had the shape been more complex I would have re-rendered with a matte layer.  Another tip, try placing your zDepth as an alpha channel in Photoshop. Then blur the image using lens blur filter ( once in the filter options, you have to select the channel from a drop down menu). This magical trick keeps from having to use depth of field in the camera settings and saves time rendering.  I also really liked working with the lighting channel. I can’t really explain how, but it does nice things.

As always there are edits I would like to make, but like any good artwork I learned a lot during this process. The overall color scheme changed however I am okay with that. The image needed to look darker and feel more unpleasant. In this sense the lighting worked out, and overall I think it came out better then I originally sketched. I hope you enjoy!

UPDATE:

I made some minor modifications

First Publication

Traditional Work

About three years ago my roommate, Jennifer Rogers, and I  took independent studies with our anatomy teacher, Dr. Rodriguez at Virginia Commonwealth University, to help produce illustrations for their lab manual. Today we received our copies of the lab manual. It is a pretty cool feeling.

I produced illustrations of the lower extremities skeletal system. Jenn created the illustrations of the muscles in the lower extremities. Both of us used pen and ink techniques.

No no, not like Netter … like Max Brodel.

Just Learning, Traditional Work

When someone asks, “What is medical illustration?”, the answer is not very straight forward ( and sometimes those of us within the field can even be surprised as to how “all encompassing” the term can be). The first thing that usually pops into others minds is Frank H. Netter. Don’t get me wrong, he was good at what he did. However there are many more, very talented artists which practiced before him and helped establish the field.

One of histories profound medical illustrators is Max Brodel. Brodel was from Germany and came to America in his late 20’s to work for Howard Kelly. In 1911 he helped establish, and began to teach at, the first school of medical illustration, Art as Applied to Medicine at Johns Hopkins School of Medicine.

Brodel is also well known for an illustration technique he developed, carbon dusting.  Carbon dusting, as I have come to understand it, is a gradual process of adding carbon dust and applying it with a carbon pencil to a specific type of board. My class’s assignment was to recreate a carbon dust illustration by Brodel, not with carbon dust, but using Adobe Photoshop. The image I chose is shown above, a transverse section of the brain I started by doing the drawing, scanning it and in photoshop applying a mid-tone grey to the whole drawing. Next, I worked through gradually shading parts, starting large and working into small details. To do this I used a combination of shape adjusting brush with zero hardness and varying shades of gray. Sometimes I made the brush mode ‘multiply’. At other times, when needing to darken whole areas, I used the burn tool. Then I went back to lighten, add highlights, to necessary parts of the illustration. For this I used a white brush, never the dodge tool.

This was one of those pieces you could work on FOREVER, so I mainly focused on the bottom portion of the brain. The process was very enjoyable. It was easy to get lost in the details, but nice when I zoomed out and could see the piece coming together as a whole.

First Completed Assignment

Traditional Work

This is my new workspace.

During the first semester, my core course load consists of Gross Anatomy, Computer Applications, Instructional Design and Anatomical Visualization. The first assignment I just completed consists of two drawings for Anatomical Visualization. Both are illustrations of the shoulder girdle. One is an anterior view depicting ligaments, the other is a posterior view depicting axioappendicular muscles of the scapula. The goal of this assignment was to choose a perspective from each view which best described the specified muscles or ligaments.

The process began with refreshing my understanding of perspective. This was followed by life drawing of an actual model (oppose to a virtual 3-D model). The model represented a scapula, clavicle and proximal humerus. This allowed me to understand the distortion which arises when objects come at the chosen picture plan ( this can be seen in my drawing of the anterior with the clavicle). I definitely enjoyed the technique and the process of using plexiglass, to represent the picture plane, and measuring the model. After I established my initial drawing, I used textbook reference as well as my bone box to fill in details. I am excited to hear reviews of my work tomorrow. I always find it interesting to see how others perceive what I end up creating.

Below are the final products: